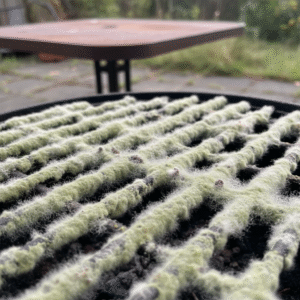
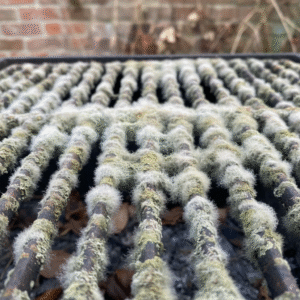
Why Mold Grows on BBQ Grills

Mold thrives in warm, moist environments with organic matter to feed on. Your BBQ grill provides the perfect breeding ground when:
- Moisture accumulates: Rain, humidity, or condensation creates ideal conditions
- Food residue remains: Grease, food particles, and marinades provide nutrients
- Poor ventilation: Covered grills without proper airflow trap moisture
- Infrequent use: Grills left unused for weeks or months become prime targets
Understanding these factors helps you prevent future mold growth and maintain a cleaner grill year-round.
Health Risks of Moldy Grills
Cooking on a moldy grill isn’t just unappetizing—it’s potentially dangerous. Mold exposure can cause:
- Respiratory issues: Coughing, wheezing, and throat irritation
- Allergic reactions: Sneezing, runny nose, and skin rashes
- Digestive problems: Nausea and stomach upset from contaminated food
- Compromised immune system: Particularly risky for children, elderly, and immunocompromised individuals
Never attempt to cook on a moldy grill without thorough cleaning first.
Essential Tools and Supplies You’ll Need
Before starting your mold removal process, gather these essential items:
Safety Equipment
- Rubber gloves: Protect your hands from chemicals and mold spores
- Face mask or respirator: Prevent inhalation of mold particles
- Safety glasses: Shield your eyes from cleaning spray splatter
- Old clothes: Wear items you don’t mind getting dirty or stained
Cleaning Supplies
- Grill Cleaning Spray/Degreaser: A powerful formula like Easy-Off Professional Oven & Grill Cleaner can cut through tough grease and mold. For extremely stubborn buildup, consider checking out our guide to the best heavy-duty BBQ cleaners for industrial-strength cleaning power.
- White vinegar: Natural antifungal properties make it excellent for mold removal
- Baking soda: Gentle abrasive that neutralizes odors
- Dish soap: Dawn or similar grease-cutting formula
- Bleach solution: 1 part bleach to 10 parts water for disinfection
Tools
- Grill brush: Bristle-free grill brush for safe scrubbing
- Scrub pads: Non-abrasive pads for delicate surfaces
- Microfiber cloths: For wiping and drying
- Bucket: For mixing cleaning solutions
- Garden hose: For rinsing
Step-by-Step Mold Removal Process
Step 1: Safety First
Put on all safety equipment before beginning. Work in a well-ventilated area, preferably outdoors. If working in a garage, open all doors and windows.
Step 2: Remove Grill Components
Take apart your grill systematically:
- Remove cooking grates
- Take out drip pans and water pans
- Remove any removable parts like flavorizer bars or heat tents
- Disconnect and remove propane tank (for gas grills)
Step 3: Initial Inspection and Dry Removal
Examine all components for mold growth. Use a dry brush to remove loose mold spores and debris. This prevents spreading mold during the wet cleaning process.
Step 4: Apply Cleaning Solution
For heavily molded areas, start with a commercial grill cleaner:
- Spray the cleaner generously on all affected surfaces
- Let it sit for the recommended time (usually 10-15 minutes)
- Focus extra attention on corners, crevices, and areas with heavy buildup
Step 5: Scrub and Agitate
Using your grill brush and scrub pads:
- Work in circular motions to lift mold and grime
- Pay special attention to grill grates and interior surfaces
- Use different tools for different surfaces—soft cloths for painted areas, brushes for grates
Step 6: Vinegar Treatment
Create a natural mold-killing solution:
- Mix equal parts white vinegar and water in a spray bottle
- Spray all surfaces thoroughly
- Let sit for 10 minutes to kill remaining mold spores
- The vinegar smell will dissipate as it dries
Step 7: Rinse Thoroughly
Use your garden hose to rinse all components:
- Start from top to bottom
- Ensure all cleaning residue is removed
- Pay attention to drainage areas and grease channels
Step 8: Disinfect with Bleach Solution
For complete sanitization:
- Mix 1 part bleach with 10 parts water
- Apply to all surfaces using a spray bottle or cloth
- Let sit for 5 minutes
- Rinse thoroughly with clean water
Step 9: Final Rinse and Dry
Give everything a final rinse and dry completely:
- Use clean water for the final rinse
- Wipe down with microfiber cloths
- Allow to air dry completely before reassembly
- Consider using a leaf blower to speed drying in crevices
Dealing with Stubborn Mold Stains
Some mold stains may require extra attention:
Baking Soda Paste Method
- Mix baking soda with just enough water to form a thick paste
- Apply to stained areas and let sit for 30 minutes
- Scrub with a non-abrasive pad
- Rinse thoroughly
Lemon and Salt Treatment
- Cut a lemon in half and dip in coarse salt
- Rub directly on stained areas
- The acid helps break down stains while salt provides gentle abrasion
- Rinse and repeat if necessary
Cleaning Different Grill Types
Gas Grills
- Always disconnect propane before cleaning
- Clean burner tubes carefully to avoid damage
- Check gas lines for any signs of corrosion
- Clean grease management system thoroughly
Charcoal Grills
- Remove all old charcoal and ash
- Clean air vents inside and out
- Pay special attention to the charcoal grate
- Check for rust in the firebox
Electric Grills
- Unplug before cleaning
- Avoid getting electrical components wet
- Focus on removable plates and drip trays
- Use damp cloths for non-removable parts
Post-Cleaning Inspection and Reassembly
Before putting your grill back together:
Quality Check
- Inspect all surfaces for remaining mold or stains
- Check for any damage that occurred during cleaning
- Ensure all components are completely dry
- Look for signs of rust or corrosion
Reassembly Tips
- Reassemble in reverse order of disassembly
- Check that all connections are secure
- Test gas connections with soapy water (for gas grills)
- Ensure proper alignment of all components
Preventing Future Mold Growth
Prevention is always easier than removal. Follow these strategies:
Regular Maintenance Schedule
- After each use: Clean grates while still warm
- Weekly: Empty and clean drip pans
- Monthly: Deep clean interior surfaces
- Seasonally: Complete disassembly and thorough cleaning
Proper Storage
- Use a high-quality, breathable grill cover
- Ensure adequate ventilation around stored grills
- Store in a dry location when possible
- Consider using moisture absorbers in covered grills
Climate Considerations
- Humid climates: Clean more frequently and ensure better ventilation
- Coastal areas: Rinse regularly to remove salt buildup
- Rainy seasons: Check and clean more often during wet periods
When to Call Professionals
Consider professional cleaning services if:
- Mold covers more than 50% of the grill interior
- You have health conditions that make mold exposure risky
- The grill hasn’t been used for over a year
- DIY cleaning attempts haven’t been successful
- You discover structural damage during cleaning
Natural vs. Chemical Cleaning Solutions
Natural Solutions (Pros and Cons)
Pros:
- Safer for food contact surfaces
- Environmentally friendly
- Less expensive
- Readily available
Cons:
- May require more elbow grease
- Less effective on heavy buildup
- Takes longer to work
Chemical Solutions (Pros and Cons)
Pros:
- More powerful against tough mold
- Faster results
- Better for heavily contaminated grills
Cons:
- Requires careful handling
- Must be thoroughly rinsed
- More expensive
- Environmental concerns
Troubleshooting Common Issues
Persistent Odors
If mold odors linger after cleaning:
- Repeat the vinegar treatment
- Leave baking soda in the grill overnight to absorb odors
- Run the grill on high heat for 15-20 minutes to burn off residual smells
Recurring Mold Growth
If mold keeps coming back:
- Check for hidden moisture sources
- Improve ventilation around the grill
- Clean more frequently
- Consider relocating the grill to a drier area
Damage Assessment
Look for these signs that may indicate replacement is needed:
- Extensive rust that compromises structural integrity
- Warped or cracked cooking surfaces
- Damaged gas lines or electrical components
- Mold growth that has penetrated deep into porous materials
Seasonal Cleaning Schedule
Spring Preparation
- Complete deep clean after winter storage
- Check all connections and components
- Replace any damaged parts
- Season cast iron grates if applicable
Summer Maintenance
- Weekly cleaning during heavy use periods
- Monitor for early signs of mold in humid weather
- Keep drip pans clean and empty
Fall Preparation
- Thorough cleaning before reduced use
- Apply protective coatings if needed
- Check and clean grill covers
Winter Storage
- Complete cleaning and drying
- Proper covering and storage
- Periodic checks during storage period
Final Tips for Success
- Work systematically: Don’t rush the process—thorough cleaning takes time
- Document the process: Take before and after photos to track your progress
- Invest in quality tools: Good brushes and cleaners make the job easier
- Stay consistent: Regular maintenance prevents major mold problems
- Know your limits: Don’t hesitate to seek professional help for severe cases
Remember, a clean grill is not only safer but also produces better-tasting food. The time invested in proper mold removal and prevention pays off in improved grilling experiences and extended equipment life.
By following this comprehensive guide, you’ll have the knowledge and confidence to tackle even the moldiest grill and restore it to safe, functional condition. Regular maintenance and proper storage will help ensure you never have to deal with such extensive mold growth again.